HOW DOES WATER ENTER THE BASEMENT?
Surface water from rain or melting snow and ice will always travel to the lowest parts of your property. The most vulnerable areas are : windows, doorways, outdoor staircases going down into the basement and lastly, the most common area, the foundation wall. Any water that stays pooled close to the foundation wall for too long has the potential to penetrate the basement.
Foundation cracks make good entry points for water to enter the basement. These cracks can be located on the inside and outside of your basement walls and can also be found above ground and below ground on the outside. When cracks are discovered, they should be repaired immediately before they get worse. In colder climates, a crack can worsen quickly due to the high number of freeze/thaw cycles allowing the water that has penetrated to freeze and contract causing the crack to worsen.
Weeping tiles are perforated pipes located at the base of your foundation designed to capture groundwater and divert it away from the foundation walls. A collapsed, clogged or overwhelmed weeping tile system will not allow water to escape your foundation walls hence leaving it no choice but to penetrate through at the floor level inside the basement.
Weeping tile exits are designed to receive the water from the weeping tiles and discharge that water to a more favourable location. Examples of these exits are: sump pump systems, municipal storm systems, ditches, and “French drains”. If these exit points become compromised and stop working, water from the weeping tiles will not drain out therefore leaving it no choice but to penetrate through at the floor level inside the basement.
Broken sewer and water lines can also cause a flooded basement. A ruptured water line on your property or even your neighbour’s property has the potential to seep into your basement. This water seepage often resembles that of a faulty weeping tile which is why it is important to carefully choose contractors who have experience with both scenarios.
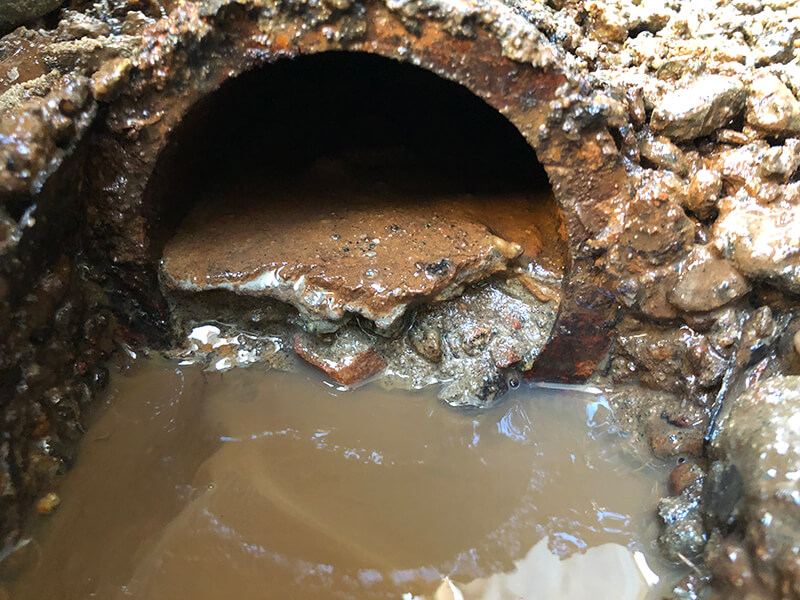
Old Clay Weeping Tile
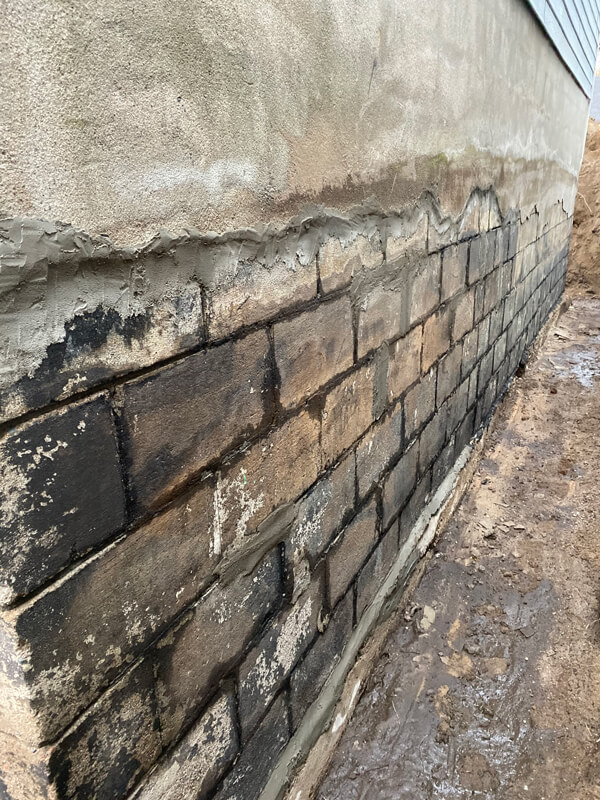
Mortar joints in desperate need of repair.
Simple steps to prevent water from entering the basement
- To prevent surface water from entering the basement ensure that your landscaping on the outside (ie: grass, driveways, interlocking brick) is sloped away from the house. Ensure at least 5 feet of positive slope away from the foundation wall if possible. Install window wells and raise the grade close to the house if necessary to ensure sloping away from the house.
- Minimize the surface water through proper eavestrough (gutters) on the roof and ensure the downspouts divert the water far away from the foundation walls.
- Avoid trees and plants close to the walls. Watering these plants will only add extra water close to the foundation and tree roots have tendencies to penetrate and clog weeping tiles.
- Properly seal all windows, doors, and anything coming through the foundation wall with proper outdoor sealants.
- If cracks in the foundation are discovered, do not attempt to seal them from the inside unless it is a poured foundation. If you have a block foundation, you must seal the crack from the outside only. Once you’ve exposed the crack until it has stopped cracking, repair it with either hydraulic cement or some sort of sealant suitable for outdoor and below ground applications. If you discover a crack on a poured foundation, call us and we will inject resin inside the crack and fill it completely top to bottom.
- Make sure the visible portion of the foundation’s concrete blocks are well sealed with parging cement.
- Clean out floor drains at the bottom of staircases
- Make sure your “tile exits” described in the section “How does water enter the basement” are free flowing. Remove grass build-up at the openings of these pipes in the ditches. Ensure your sump pump’s discharge line is pumping out ok.
- Inspect and clean your sump pump systems.
- Before the spring thaw: a)remove snow away from the foundation; b) ensure roof downspouts aren’t frozen; c) if you know where water tends to pool and cause problems, chisel a channel in the ice to divert the water away from that area once it starts melting; and d) test your sump pumps.
Camera Scoping and Pipe Jetting
Water in the basement isn’t always a major problem that will cost tens of thousands of dollars to repair. More often than not there are more cost effective solutions than waterproofing your entire foundation and changing your entire weeping tile system. Yes, such undertaking will likely resolve your issues however it comes with a heavy cost and it may be more than what you need.
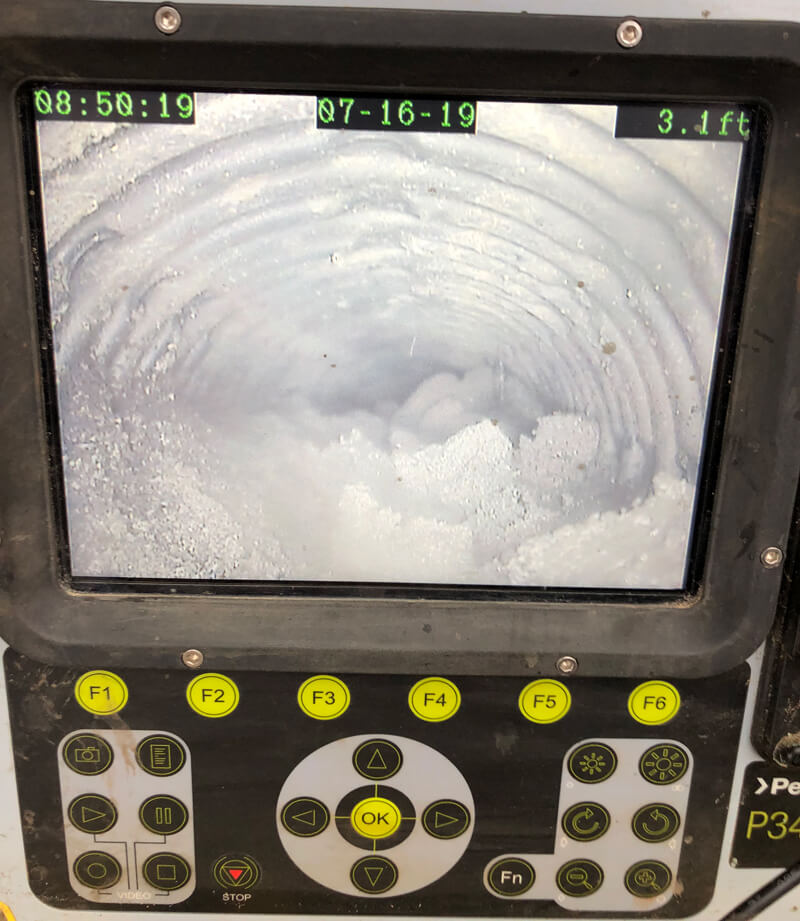
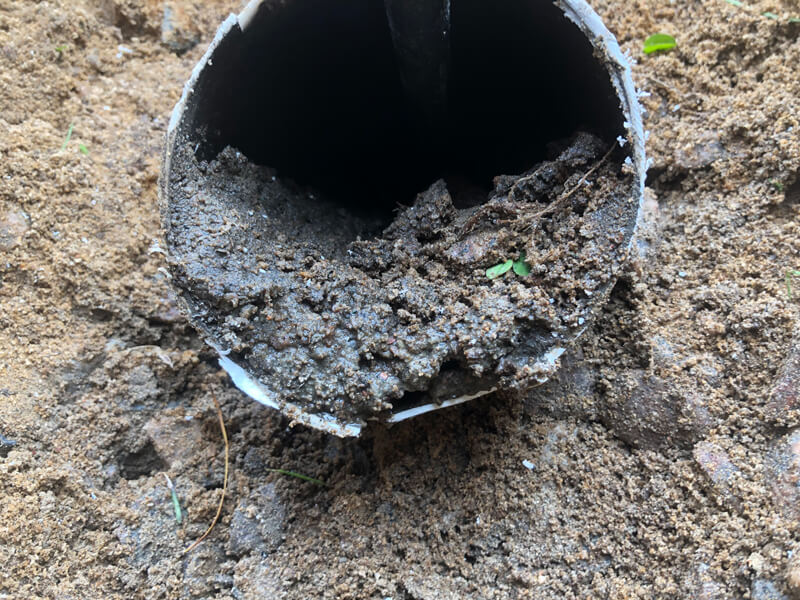
Specialty equipment like our detectable underground camera and our pipe jetting equipment often allow us to pinpoint exactly where the problem is. For instance, if a weeping tile issue is suspected, we first gain access to the tile, then we flush out any sludge or sediment with our jetting equipment. This step alone can often resolve the issue of a clogged weeping tile as long as it was done properly which is why I recommend camera scoping after the flushing to confirm the tile is clean. If the problem is more than a simple iron buildup then you may see in the camera a collapsed pipe, a severely clogged section, or a complete disconnect in the pipe that has allowed sand to infiltrate and block the system. If such problems are seen in the camera, we can detect the camera from the surface, dig down to that location and repair the problem, a much cheaper endeavor than replacing the entire weeping tile system.
These two pieces of equipment combined with years of experience has helped me solve hundreds of people’s problems saving them enormous amounts of time and money!
Our “Guaranteed Method”
If we cannot resolve your water issues through our minimally invasive procedures in the previous sections then you may have a bigger problem on your hands. At this point, it is most likely a weeping tile or a foundation issue that will require some sort of excavation. Depending on your budget and your level of patience, we can either a) address the problem area only OR b) address the entire house at once and then you would be completely done with it. Care must however be taken when you address only one section at a time. Failing to ensure that the new section of weeping tile can drain out where it is supposed to can result in a complete project failure. For example, let’s say you’ve been dealing with water coming in every Spring at the back wall of the house. You hire Joe Blo down the street who has his own excavator to dig up the entire back wall. You do a bang on job replacing the weeping tile and waterproofing the wall because you used our “Guaranteed Method”. The job is done, Joe Blo backfills. You restore your entire basement with new drywall and flooring. Next Spring comes around and what do you know, water comes through again! Why, why, why as you’re banging your head on the basement floor. Reason: the old weeping tile that is still on both sides of the house are both blocked solid preventing your new section from getting to the sump pump system at the front. Result: another flooded basement.
While I am more than excited to share this next “guaranteed method” of mine, I do want to remind you that every project is different and it is the combination of years of experience, the proper equipment and our “guaranteed method” that will guarantee a successful outcome every time!
Our "Guaranteed Method":
- Excavate alongside the foundation wall down to the existing weeping tile or at the base of the foundation footing. Do not excavate below the bottom of the footing.
- Examine the soils. A silty/clay soil should be replaced with a coarser sand fill to allow water to freely percolate through. Water that remains tight to the foundation due to poor soils can even penetrate a new waterproofing system.
- Thoroughly wash the entire foundation with a pressure washer to remove any loose debris.
- Chisel off any rough spots such as concrete chunks, tar or form ties. Also chisel any lose section of cove joint (if any).
- Once the walls and footings have been cleaned and stripped of any loose materials, you will use hydraulic cement to repair all cracks and faulty mortar joints. You will also repair or put in place the cove joint. The cove joint is where the block wall and the footing meet up. You need to ensure a ramp like connection between both so that the water coming down the wall will easily flow off the cove and footing area.
- You are now ready to waterproof. STOP AND PAY ATTENTION: What method to use will depend on the condition of the wall. Most foundations have had some sort of damp proofing done when it was originally built. The most common method was tar and plastic but often it was just tar. The amount of tar that remains on the foundation after you have washed it will determine what type of waterproofing product to use. If the tar is still intact and cannot be removed you are limited to using a similar tar like product. Our preference is Bakor 710-11 or 720-38 combined with a fibreglass yellow jacket. Many contractors make the mistake of using Blueskin at this point but unfortunately Blueskin does not adhere properly to an existing tared foundation. If you are however able to remove most of the tar then you have a few options. Blueskin is a fantastic product when installed according to the manufacturing specifications. The limitations we found with BlueSkin was its inability to adhere properly on most footings. A foundation wall and footing must be 100% dry before commencing the Blueskin process otherwise it won’t stick. It just seems that most footings cannot dry 100% perhaps because it’s been sitting in water for the last 60 years or so:). This is why we use Tremco products. This super amazing foundation sealer will adhere to moist concrete and even freshly poured concrete! You can either Blueskin the wall and Tremco the footings which work very well together or our preferred method is spray applied products that not only go on quickly but really creeps into all the little nicks and crannies giving you a 100% foundation seal. Once you have chosen the appropriate method to waterproof be sure to correctly follow the manufacturer’s installation process.
- After applying multiple layers of our spray applied foundation coating, we then install a drainage board overtop the entire system from ground level down to overlapping the footing. This hard plastic layer will protect the membrane during backfill, allow airflow to the membrane allowing it to fully cure and also provide an additional layer of protection against water. Any water creeping towards the wall will be diverted to the weeping tile along the drainage board. A seal strip must be installed and sealed at the top of the drainage board to prevent backfill from getting behind the drainage board.
- The most important step in securing your basement from water seepage is the weeping tile. The tile must be perforated (don’t laugh I have seen it non-perforated) and layed tight to the face of the footing. The bottom of the weeping tile needs to be at a minimum two inches below the top of the footing with a slight fall towards the exit drain. Note: any sections untouched such as the exit drain towards the municipal sewer should be camera scoped to ensure it is free from any debris or obstructions. Once the tile has been placed, make sure to connect multiple cleanouts for flushing and future access and also a drainage pipe for your window wells. DO NOT connect roof run off pipes to the weeping tile. Lastly, place 10-12 inches of clear stone overtop and on the side of the weeping tile, make sure the tile remains tight to the footing. Place a light filter fabric overtop the entire stone layer to prevent sediment from infiltrating the stone media.
- Backfill. Care must be taken not to crush the tiles or displace the filter fabric. Care must also be taken not to over pack with the machine bucket which could cause damage to the foundation wall. Mechanical compaction can be used but care must be taken not to damage the drainage board and/or membrane and also not to cause damage to the foundation wall itself. My preference is to moderately compact with the machine bucket only. Sedling will inevitably occur along the wall, just make sure that the dips and settled locations are filled up high before winter sets. Ensure a positive slope away from the house at all locations. If light compaction methods are used, allow soil to settle for one year before doing any final landscaping.
- Keep lids on all access pipes at all times. Children love to drop rocks and toys down these pipes which can cause instant system failure!
Good Luck!